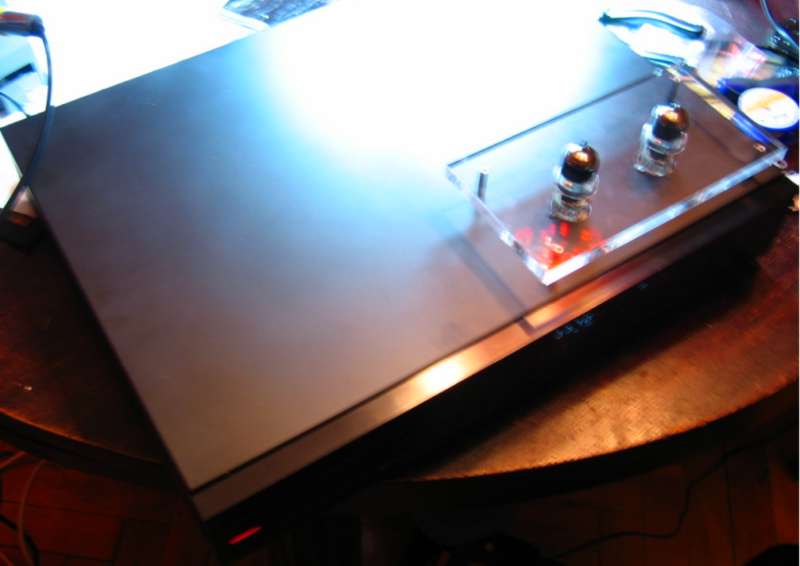
GRUNDIG CD 9000
Built circa 1987. Lampized on
dec 29th 2006 and revisited in april 2007. 5 units done so far.
DAC: TDA1541A, mechanism Philips CDM2, Oversampling: NOS

This is a very interesting player.
After I was totally amazed by the superb built and sound quality of the
top Grundig CD 9009, when I found this poorer cousin - I had to try it
so I bought it.
Straight from the box it looks georgous. It is slim, sleek, elegant,
with sexy side cheeks made of veneered particleboards and very eleganly
laid out face
plate.
(CD-903 is almost the same, but CD-905 looks the same and it is a JVC
inside. Beware !)
Inside there is a mixed bag - on one hand they use the best mix of
elements but without any impressive gimmicks like copper chassis, three
layer floor, double S dacs, etc.
The mechanism is a very good Philips CDM-2 with Grundig Fine Arts
drawer taken from CDM-1mk2. Overall very good mechanism indeed. It
opens
and closes very very fast and reads every CD immediately. These CDM-2-s
do break often, but then again - they are easy to find inside 20 Euro
players like Philips CD150. Usually - it is enough to clean the lens,
adjust focus - and it works again.
All parts are Philips and the DAC - most important part - is the
Philips gem (my favourite) TDA1541A. Sometimes it is A, rarely not A,
but never the S unfortunately). So
far so good. There is little space for lampization but just enough.
The oversampling chip and filter ios the Philips SAA7220P/A or
sometimes /B. Both are worth bypassing in NOS mode.
For those using this player as transport - the pin 14 of this chip has
SP/DIF readily available.
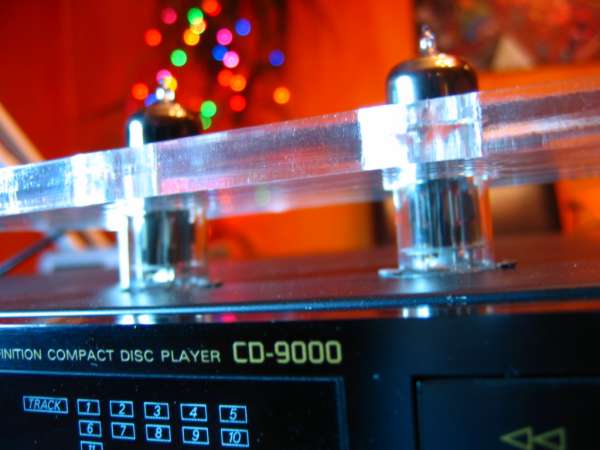
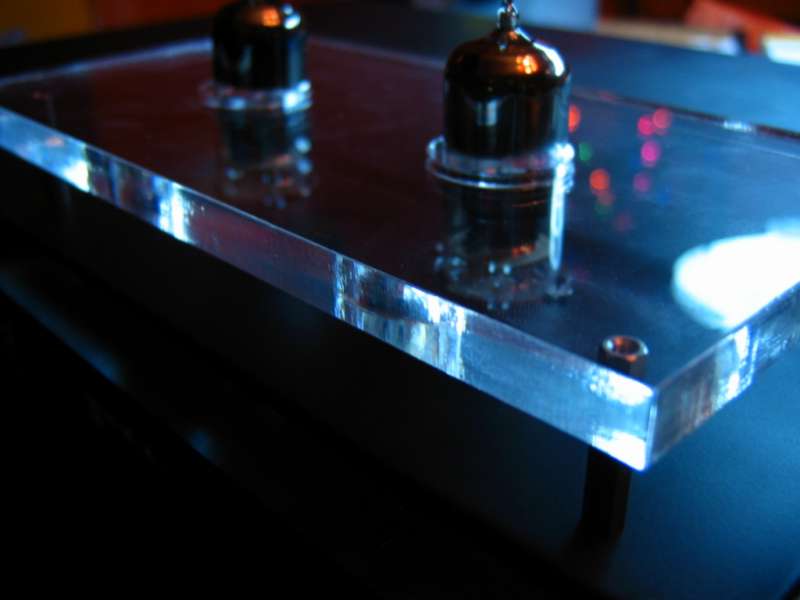
I opted for internal visible single ended lampization.
The easy aspect is that the PCB is already upside down - easy to
solder. But removing it - to reach the electrolytic caps - requires a
tricky job of removing the radiator that dissipates heat from voltage
regulator chips.

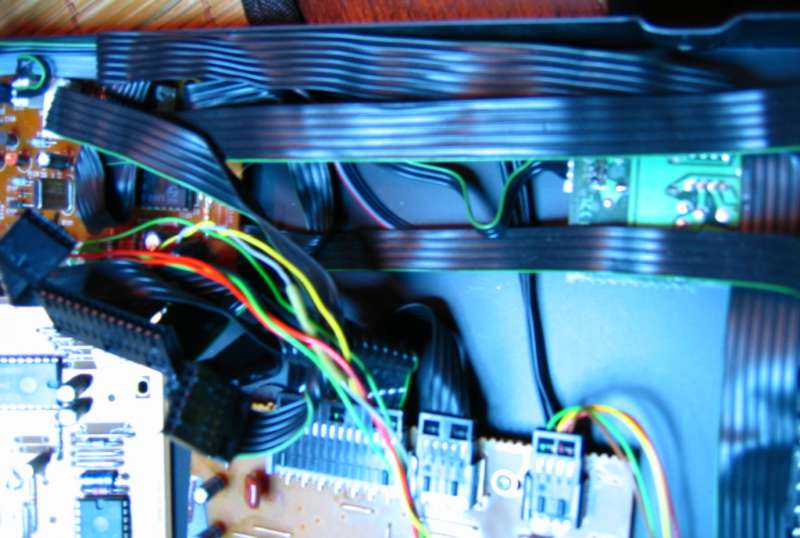
Inside
the Grundic CD9000
I
was only a little worried by the internal execution of this player -
it is a little messy, totally opposite of the elegant job of CD-9009 or
not to mention the Copland 289 - the champion of build quality and
execution.
Just look at these ribbons - not very Teutonic. Olufsen would have
never done that !
Anyway, the great DAC is what matters so I took my soldering rig.
Lampizator
meets Grundig
First I removed the original cheap op-amps for I/U conversion and I put
in the BB OPA 2604 s
A year later of course I would have never used op-amp but the resistive
conversion. Which I eventually did.
Next - I found a space for the Lampizator transformer - under the
drawer sliding
rails.
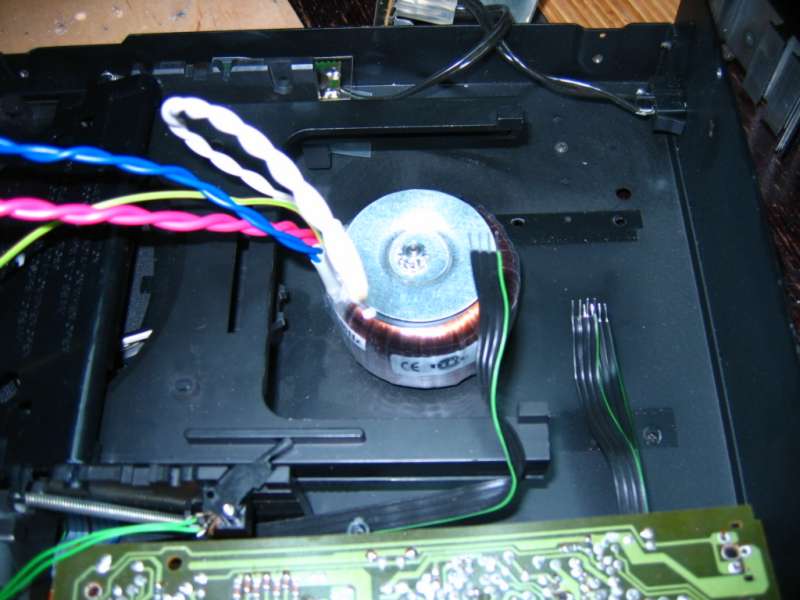
Next I drilled the 23 mm holes in the top cover and installed tube
sockets with Lampizator's SRPP active schematics on the pins.
I wired everything and I took the signal from leg 1 of respective
op-amps. Unfortunately this player is too simple to invest in Sowter
transformers in order to get rid of this firts half of an op-amp
entirely. But of course anyone inclined is more than welcome to add 130
GBP to the overall cost and take the sound quality to the next level.

The famous WHITE laser module under the drawer.
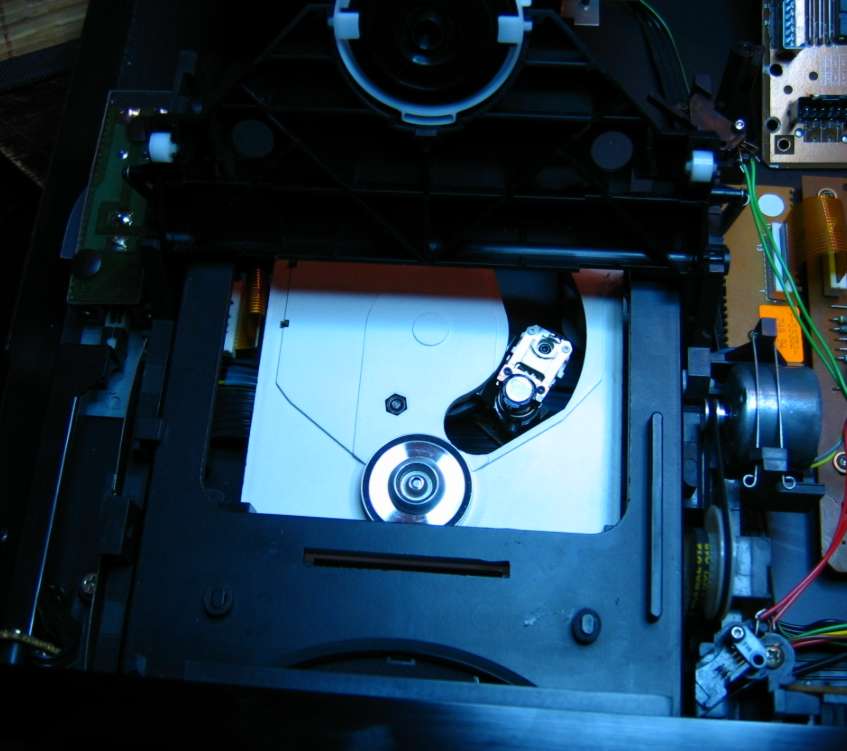
Drawer is very good - like in CDM1 MK2 machines.

This is servo controller for laser. Note two pots like in every Philips
player (the blue rectangles with a hole in the middle)
These controll laser head focus height and beam power.
Better do not turn them because adjustment is tricky. I already
mastered it.
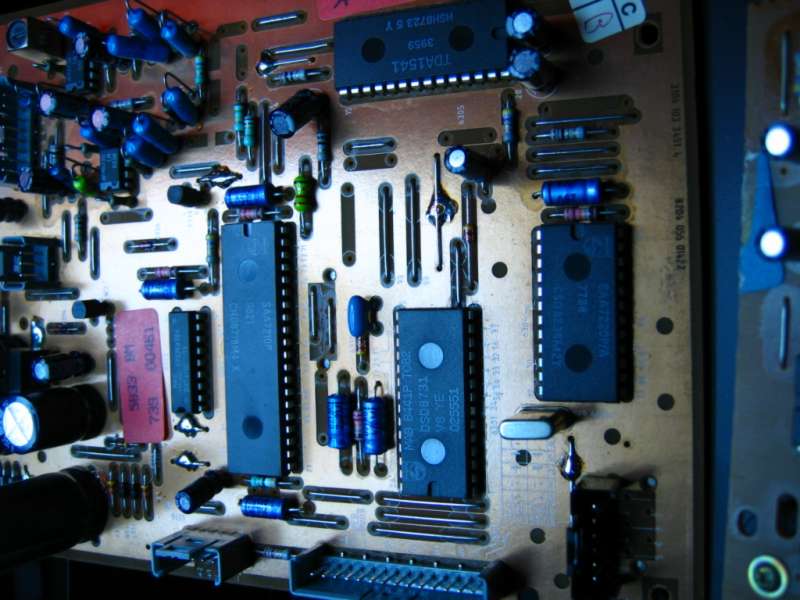

The PCB is golden-colored, which means that on the component side - all
surface is a ground plane. Very convenient for tweakers and modders.
Same PCB as in Philips CD304MK2. And in Marantz CD40, CD60, CD50, etc.
And in
Philips 630. And Grundig 8100.
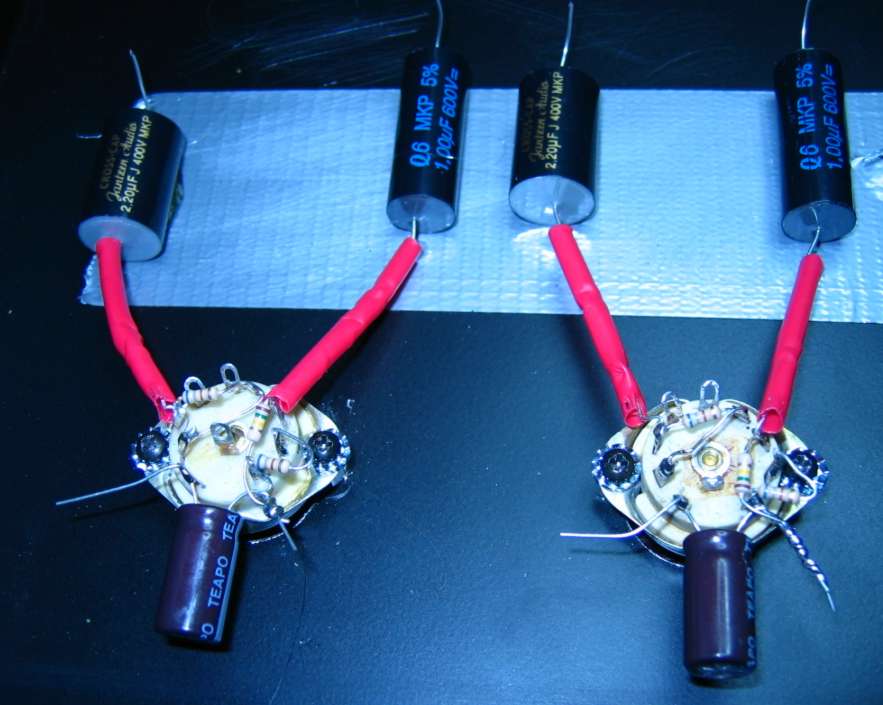
Lampizator
visible
I tried three tube types: 6N6P, 6N1P, and then the magical 6N2P which
is by far the best for this player, that's the one which stayed !
R k cathode is 200 Ohms, and I-anode is 1 mA.
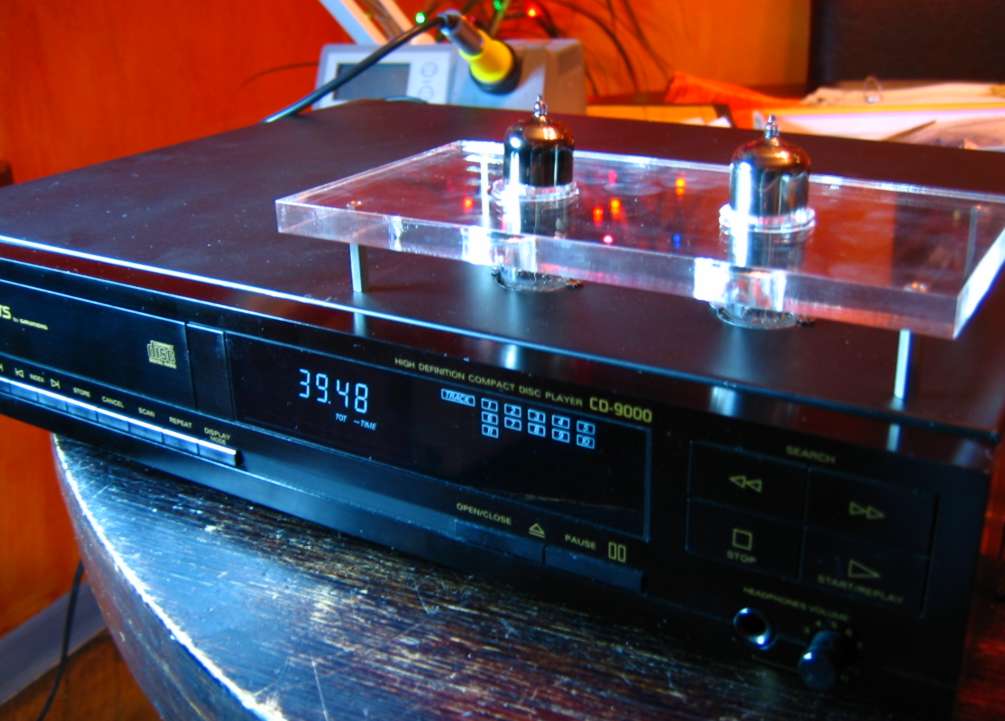
I decided to stick tubes out and add plexi plate to make it sexier.

The resulting sound is very nice - it has all qualities of the
TDA1541A-S1 chip without the finest refinement of the costly cousin.
It is very rhytmical and musical and I recommend it to everyone looking
for a base for lampization in the 100 Euro range.

NOW one year later - knowing more - I did the better mod.
TDA1541A
in passive R conversion I/U
I did the I/U conversion by means of 80 Ohm resistor from a DAC.
This cleans the sound quite a bit.
Then I changed the SMD capacitors that de-couple the DAC for larger but
better 220nF (0,22uF) / 63 V MKT capacitors. That is 17 caps under the
PCB. Another big step. A little leter I discovered that it is better
toADD the new caps across the SMD not substitute. In paralell they are
more effective. And larger too.
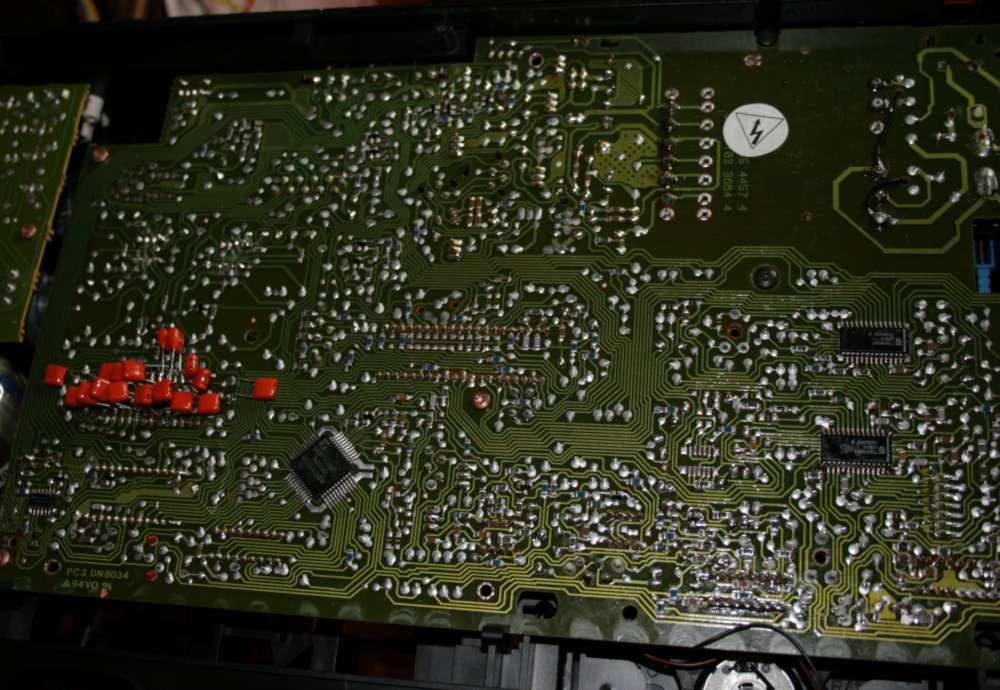
SMD replaced with orange MKT caps. But this PCB photo is from
Philips player, not Grundig.
NOS of the Grundig CD9000 with Lampizator
Last thing I did - I replaces all electrolytic caps on the main PCB
(except of course the "now dead" analog section of the board) with
computer grade low ESR TEAPO brand (increasing capacity by 10 x.)
These mods take this player from a "nice one" league to a real giant
killer.
In fact - I recommend to listen to it without tubes - just in bypass
snipit mode. Just do all the
mods, replace first pair of op-amps with BB-2604 and go from leg 1 of
opamps to RCA (new ones) via a paper in oil (or any other MKP)
capacitor from range 1-10 uF by 63 V or more. Also by all means do the
non-oversampling mod like described here for
CD50 with identical PCB.
The NOS, (I performed on July 27th 2008) is very easy - it worked from
the first try. I floated the TDA1541A pins 1, 2 and 3 (keeping the
bridge from 2 to 4)
and wired them directly from SAA7110 - the pins which are connected to
SAA7220p/B to pins 1, 2 and 3. Then to have MUTE working I floated pin
11 of SAA7110 by lifting the resistor SMD marked 000 (jumper) and
wiring the now floating pin 11 to the pin 23 of the SAA7220p.
As last tip I can recommend to use the tube 6N2P (best variant is
6N2p-EB ) which is 1:1 substitute for 6N1P but plays MUCH better. Just
adjust the heaters to be within specs - 6,3 VDC per tube.
This will blow your head off.
BACK